Today we are going to discuss how to customize email templates with the help of QuickBooks Desktop Support Team and how we can use them to send messages from QuickBooks.
If users want to personalize their emails to customers and vendors? They can create email templates with customized subject lines and email bodies. Then all users have to do is to select the one while they send an invoice, sales receipt, estimate, or other transaction.
Step 1: You may create and customize a template
- First of all, log in to QuickBooks as an admin. Users can also log in as a user with permission to edit company preferences.
- Next, navigate to the File menu and then select Switch to Single-User Mode.
You should follow these steps for each template that users want to create. You can create multiple templates for each transaction type.
- First, navigate to the Edit menu and then select Preferences.
- Next, click & select the Send forms menu and then the Company Preferences tab.
- Click & select Email from the Delivery Method Default drop-down menu.
- After that, click & select a transaction type from the Email Templates drop-down menu. You can create multiple templates for each transaction type transaction listed.
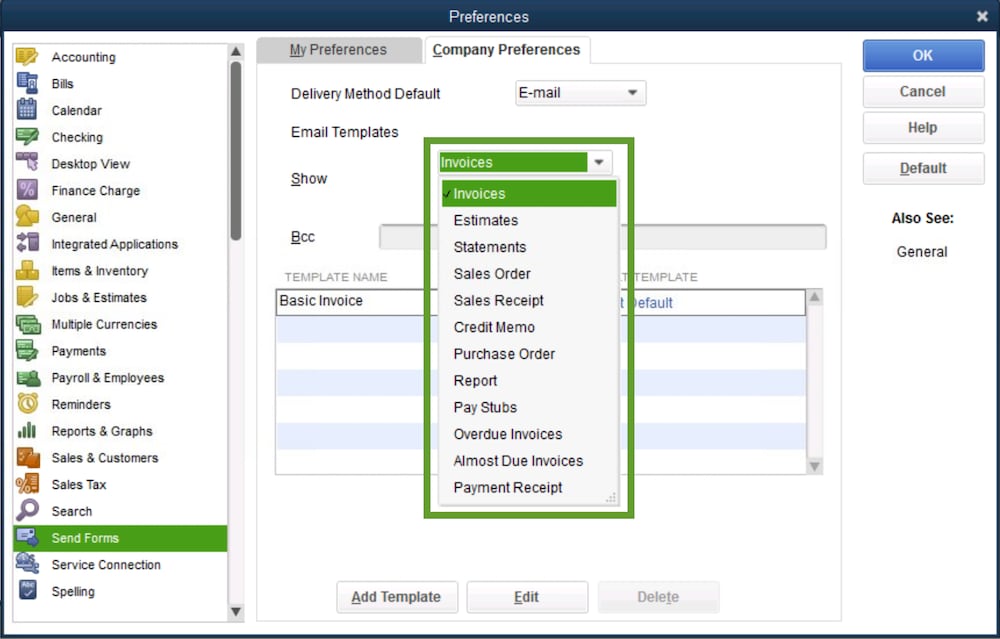
- Click & select Add Template.
- You should give your template a name.
- You need to customize the subject line and body.
- Users can select Insert Field to put a dynamic data field in their email. These use real data from the form, like the customer name or due date, to fill out the field.
- Once you are good to go with customizing, then select save. After you close the template, click & select OK in the Company Preferences tab to save your changes.
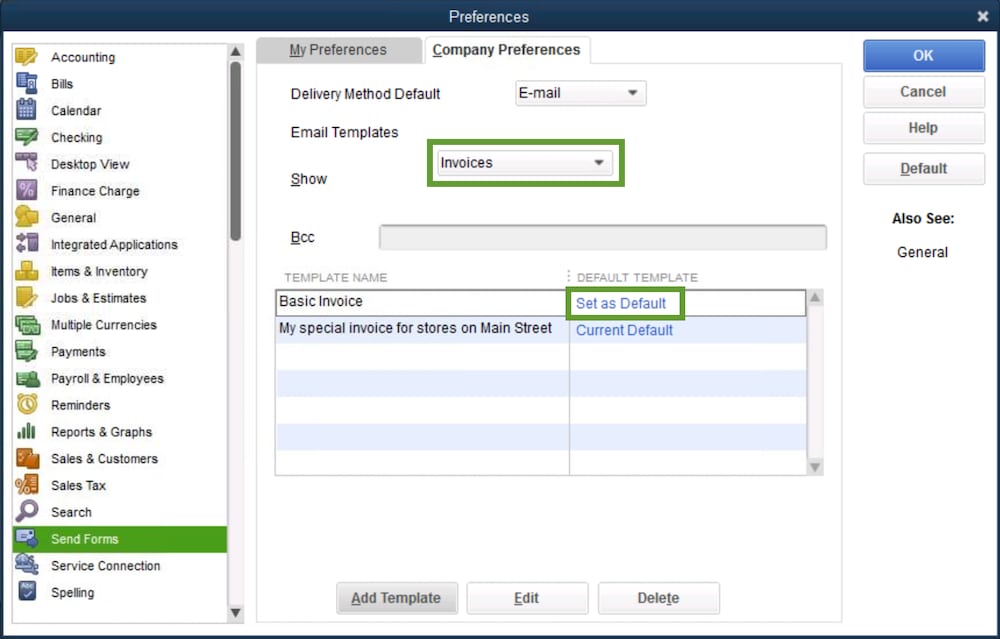
Your company templates will appear in the Company Preferences tab of the Send forms menu. In order to set one as the default, click & select a transaction type and then Set Default next to the template you want to use.
Step 2: You may use a template
Users can use their templates for emails sent alongside single transactions, batch emails, and even when they send pay stubs.
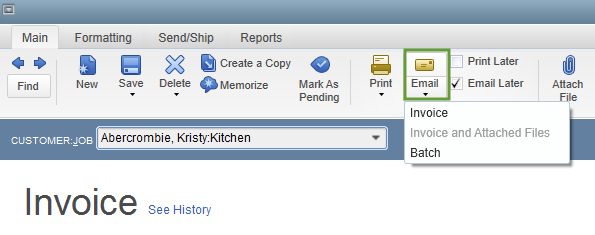
Once you create an Invoice, for example, click & select Email from the toolbar and then select Invoice. QuickBooks uses your default template for the transaction type.
In case, if users choose email later, then they can select one of their templates once they send a batch of emails. Navigate to the File menu and then click & select Send Forms. Then click & select the template that user want to use from the Template drop-down menu.
If you notice your emails aren’t using your new template, here’s how to fix email template issues.
Conclusion:
We believe that the above given information will be a help for users to know how to create custom email templates in QuickBooks Desktop with the help of QuickBooks Desktop Support team. In case, if you want to get in touch with our experts then you need to visit our website www.quickbooksupport.net or you can also draft a mail to us at support@quickbooksupport.net.